Reviews
How I built a Game Boy Macro, the greatest handheld Nintendo never created
For the Game Boy Advance’s 20th anniversary, I modded an old Nintendo DS Lite into a Game Boy Macro. Follow this step-by-step tutorial to make your own.
Twenty years ago in 2001, Nintendo changed everything with the release of the Game Boy Advance. The 32-bit handheld was the follow-up to the Game Boy Color, which enjoyed extended life thanks to a hugely popular franchise called Pokémon.
With its vast library of games from virtually every genre, the Game Boy Advance was an instant hit. But the portable was far from perfect. Before it was officially discontinued in 2010, Nintendo updated the GBA hardware with two iterations: the Game Boy Advance SP (2001), which added a backlight to the screen (2003) and the Game Boy Micro (2005), which was a shrunken handheld.
Though the Game Boy lineup was retired once the Nintendo DS succeeded it, gamers have never stopped loving the Game Boy Advance. In recent years, avid modder communities have sprung up on Reddit and YouTube and Instagram where people show off how they’ve enhanced their Game Boy Advances with all kinds of new features like new shells, better backlit IPS displays, stronger and louder speakers, and even rechargeable batteries.
You can hack together your own Game Boy Macro with minimal effort.
From these depths, the Game Boy Macro (as dubbed by the modder community), has emerged as arguably the best DIY Game Boy Advance that Nintendo never made. If you’ve got a DS Lite lying around and time to kill, you can hack together your own Game Boy Macro with minimal effort. Here’s how I made my dream Game Boy Advance.
I’ve modded my Game Boy Advance and GameBoy Advance SP with new backlit screens, buttons, batteries, and shells, but modding a DS Lite into a Game Boy Macro was, by far, one of the easiest operations I’ve had to perform.
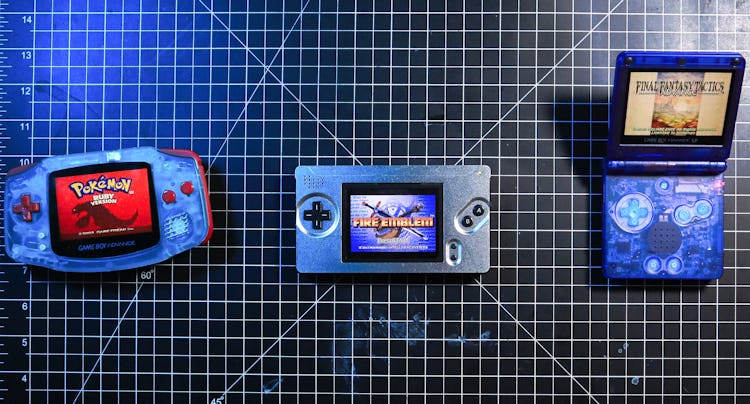
Before we start, why is the DS Lite the perfect Game Boy Advance? Because the bottom half is a Game Boy Advance. It can play any Game Boy Advance game (no GB or GBC cartridges, though) and comes with a built-in backlit screen and a replaceable rechargeable battery. While the Game Boy Advance SP has these features, a Game Boy Macro has a horizontal form factor, which makes it more true to the original Game Boy Advance.
Prep for surgery
List of items you’ll need:
- DS Lite
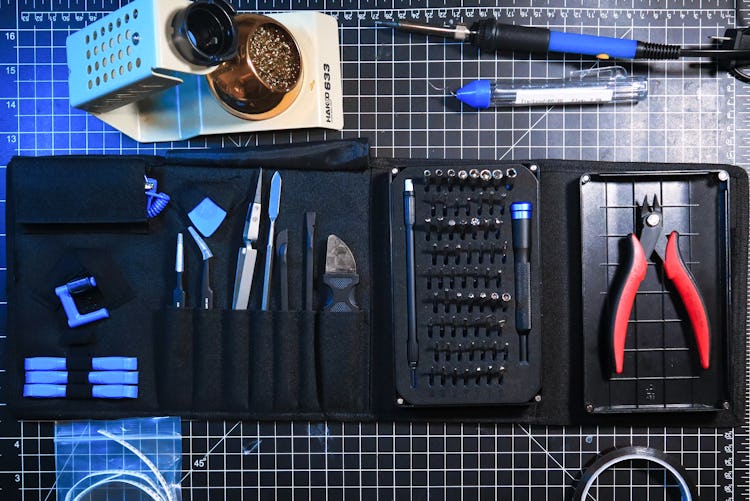
- iFixit toolkit with bit drivers, tweezers, and spudgers or cheaper alternative
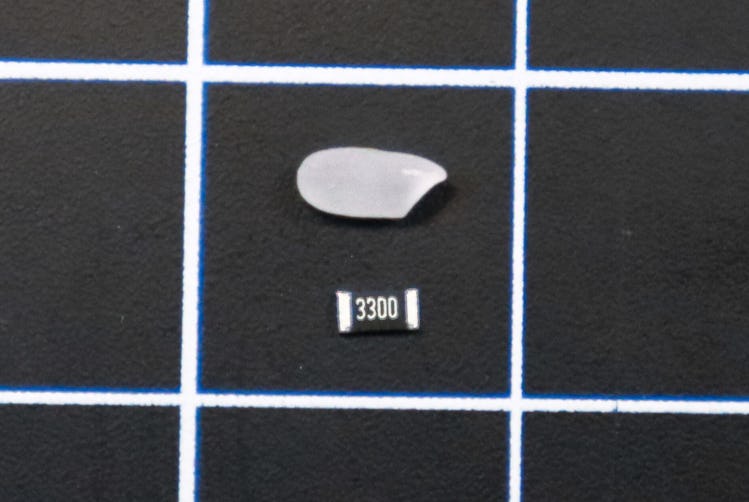
- 330 Ohm surface-mounted (SMD) resistor
- Soldering iron kit
- Kapton Tape
- Soldering Wick
- Flush cutters
- Nintendo Switch Speaker
- X-Acto Knife
- Boxy Pixel Shell
- Optional: Glass screen lens
Total budget: I spent a total of about $150 on this project for all of the parts and tools. I used a busted DS Lite that I’ve had since 2010 and I recommend you do so, too, if you can instead of tearing apart a perfectly functional DS Lite.
If you’re starting from scratch with no DS Lite, components, or tools, the cost for this mod could be as much as $200. You could cut costs and get the budget down to under $100 by doing without components like the new shell or speaker, or go with a cheaper knockoff toolkit like this one that Input Senior Reviews Editor Raymond Wong recommends, but the finished result may be a less complete Game Boy Macro. It’s still sort of pricey, but worthwhile hardware mods aren’t cheap — this project is definitely worth splurging.
This mod requires a donor DS Lite console, which you can find used on eBay for around $30-50. You’ll essentially be splitting it in half and nixing the DS portion, so maybe don’t use a DS Lite that you’re attached to. To open up the handheld, you’ll need a tri-wing and Phillips screwdriver. I recommend investing in the iFixit Pro Tech Toolkit, which contains other items, such as tweezers and spudgers, that you also need.
Tearing off the top screen is not as easy as it sounds. A DS Lite will fail to boot if it notices the top screen is missing. Not to worry, though: the modding community has figured out how to trick the system by soldering a resistor onto the PCB. To be specific, it’s a 330 Ohm resistor of, preferably, the surface-mounted (SMD) variety. You can pick up a pair of resistors for $2 from Boxy Pixel. You’ll need a soldering iron to complete this step.
This Vastar Soldering Iron Kit is suspiciously cheap and sells for between $10-20 on Amazon; I’ve used it multiple times with no issues. I’ve seen the kit recommended online, too. The kit comes with a soldering iron with a temperature dial, a solder tube, five tips, a desoldering pump, tweezers, and a stand. If you plan on using this more than once, you need a better stand to prevent the iron from moving around. You’ll also need a pair of flush cutters to snip away a socket on the PCB.
Unfortunately, the speakers on the DS Lite reside alongside the top screen and they’re too big to fit into the bottom half of the portable. Unless you want a mute Game Boy Macro, you also need this Nintendo Switch Speaker (about $6), which slides perfectly into the aluminum shell below, which you’ll need because the speaker will not fit inside the bottom half of the DS Lite.

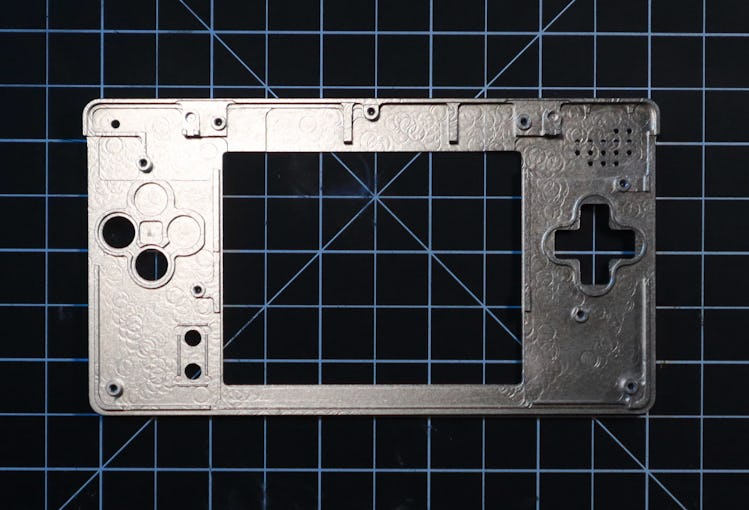
To pretty up your Game Boy Macro and house the new speaker, get Boxy Pixel’s sublime CNC machined aluminum housing shell. It only replaces the surface of the bottom half of the DS Lite, but it makes subtle improvements to the ergonomics and aesthetics. Touches like the recessed D-pad and button areas give the modded handheld a more polished feel, and it covers up the X and Y buttons for a cleaner look and more authentic Game Boy Advance layout. At $54, the shell is pricey, but so worth it. For $10 more, you can get the glass screen with a “Game Boy Macro” logo, which I didn’t buy because the font turned me off. . You’ll want to have an X-Acto knife since you’ll have to do some light cutting.
Keep calm and solder on
For first-time modders, this mod could take as long as two hours to complete. If you know your way around a solder joint, you can probably finish the entire mod in under an hour. The most crucial step for this mod is soldering the resistor, which allows the spliced DS Lite to boot without the top screen. It’s also the hardest step in the whole process. The resistor is smaller than a grain of rice and there are a dangerous number of solder pads in a very small area. If you were to bridge two pads with solder, that could cause a short, so be careful and keep steady.
While soldering might be tricky, it should be easy enough for beginners to handle. When I initially attempted this mod, it was only my third time holding a soldering iron. I was nervous and had shaky hands, but with patience (don’t rush!), I successfully pulled through. If you get solder onto anything you’re not supposed to, just use solder wick to remove it.
This mod really isn’t that difficult. You’ll essentially remove the top screen for this mod, snip the top screen connector on the PCB, solder the resistor and speaker, and put it back together using the Boxy Pixel shell. For more specific visual steps, you can check out Macho Nacho Productions’ excellent breakdown of the mod, which I followed.
Step 1: To open the DS Lite, you first need to remove seven screws on the bottom, using both tri-wing and Phillips screwdrivers for this step. Two screws are hiding beneath the battery, and another two are hiding underneath the rubber nubs located near the triggers. Take off the backside of the shell and use the Phillips screwdriver to remove the final screw holding the PCB in place. Next, extract the triggers and daughterboard beside the DS cartridge slot.
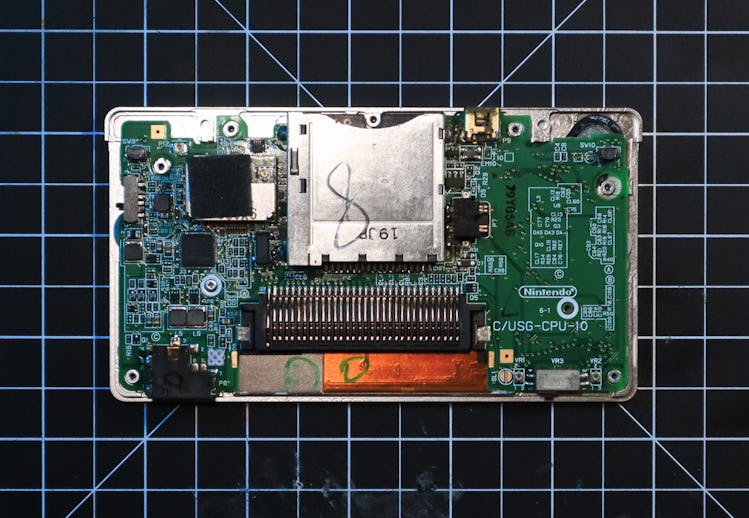
Step 2: Separate the PCB from the bottom shell and unplug the ribbon cable that connects it to the top screen. That socket is located right above the D-pad and has to be removed with the flush cutters to make space for the speaker.
Step 3: Go ahead and plug in your soldering iron and let it warm up to your desired temperature. I set mine to 350 degrees Celsius. (Maker site Pimoroni has a handy soldering guide if you need to learn how to solder.) Before soldering, unplug the ribbon cable to the left of the screen to detach the screen from the PCB. Use a spudger here to lift the plastic tab on the socket that’s holding the ribbon cable.
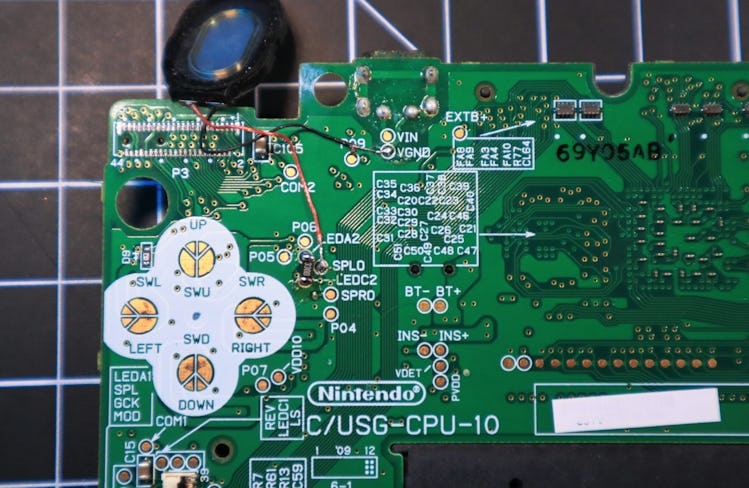
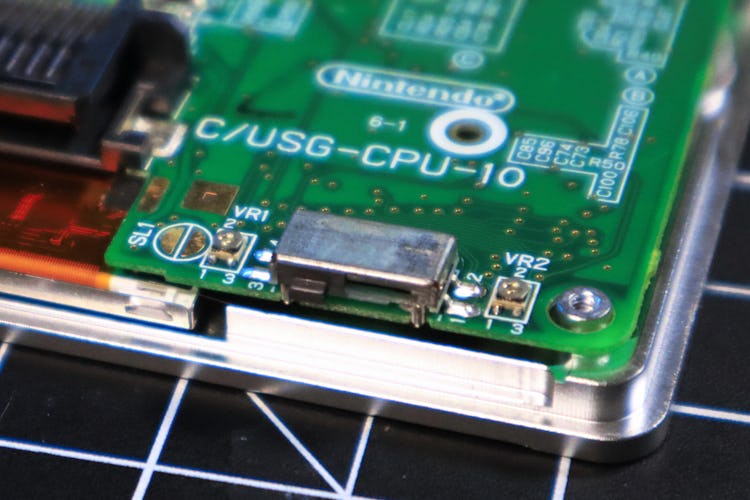
Step 4: Find two pads named LEDA2 and LEDC2, which should be to the right of the D-pad. Heat each pad for a second or two before placing a small blob of solder on each one. Next, grab the resistor and very carefully place it right between the two blobs of solder. As you heat both blobs separately, the solder should melt enough to connect with the resistor and slide it into place. Congrats! The hardest part of the mod is over.
Step 5: The DS Lite’s 3.5mm jack works fine, but an upgraded speaker is preferred. To install the thin-profile Nintendo Switch speaker to the PCB, solder one cable to a pad named SPL0 (this pad is to the immediate right of the resistor). You can solder the remaining wire to the VGND pad, which is toward the top of the PCB. To ensure a proper solder, tin the wire first by heating the exposed part and covering it in solder. It’s a good idea to cover the wires at the point of contact with Kapton tape to prevent shorting a circuit.
Step 6: Using the Boxy Pixel shell requires removing the digitizer so the system can properly align with the shell — the digitizer allows for touchscreen use, which you won’t need anymore because Game Boy Advance games don’t support touch. The process is simple but should be done carefully with an X-Acto knife, using it along the edges to separate the digitizer from the screen. Since I didn’t get the Game Boy Macro glass screen, I also removed the black plastic frame on the digitizer and stuck it onto the screen. It’s not as elegant, but hey, I saved $10!
Step 7: Before putting everything back together, connect the ribbon cable for the screen back onto the PCB and hold the battery in place with your fingers. With your other hand, flick the power switch on to make sure everything is working. The console should boot to the new user setup menu. Alternatively, you can insert a Game Boy Advance Game into the cartridge slot to test it.
Step 8: Finally, retrace your steps to reinsert the screws to put everything back together. Make sure the ribbon cable for the screen is properly seated before moving on. Also, check that the power and sound sliders align with their respective switches on the handheld, as they can easily snap off when closing the system.
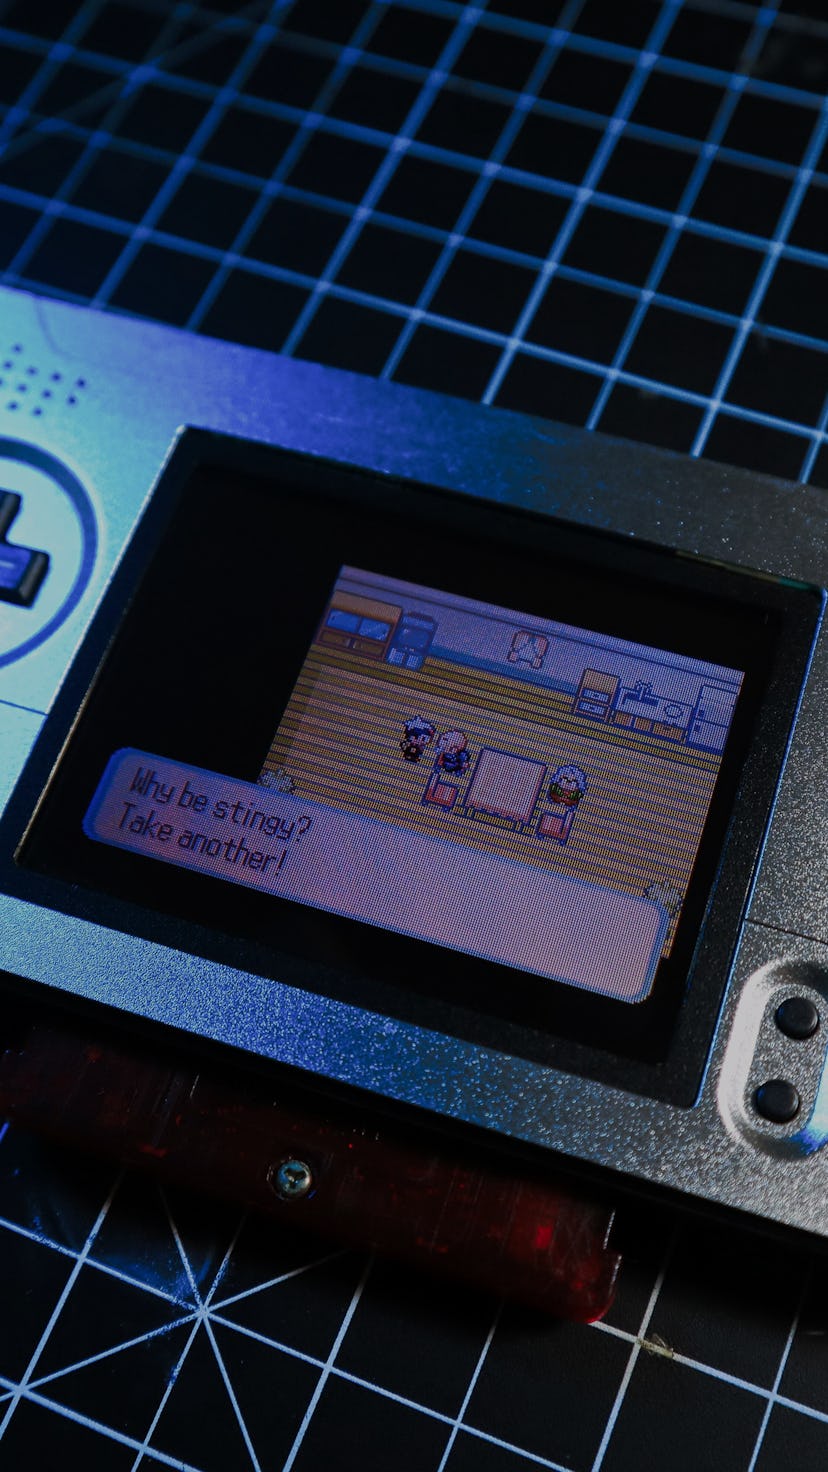
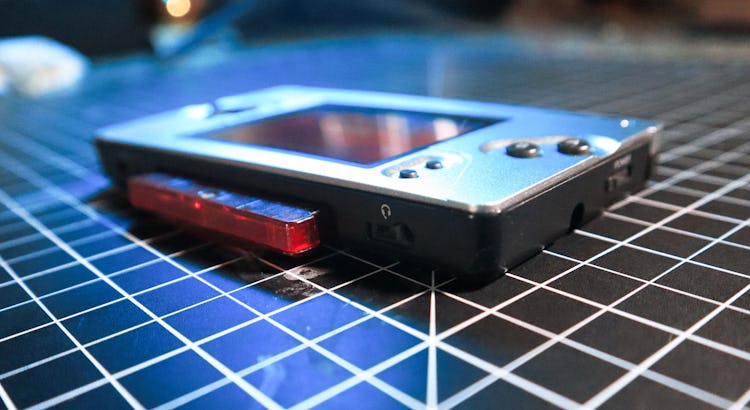
Best GBA Ever
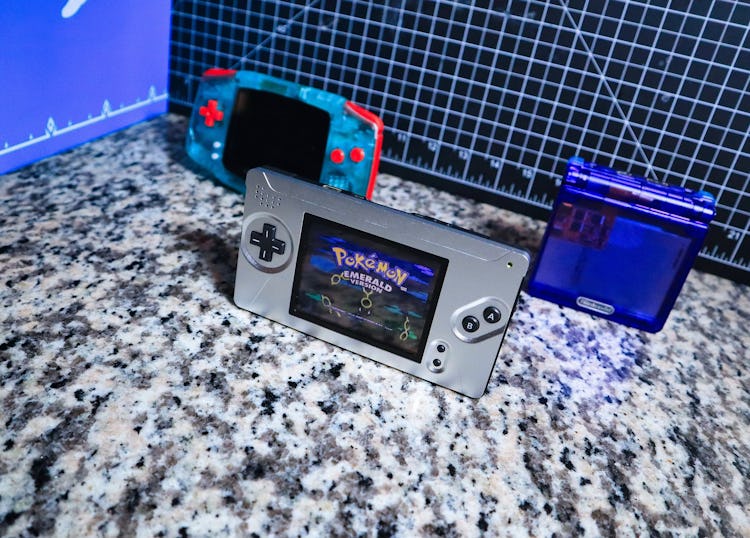
If you followed all of the steps correctly, you should have yourself a Game Boy Macro. It’s not an official Nintendo-made handheld, but it works as well as one since the hardware underneath is genuine. It is, in my opinion, the ultimate Game Boy Advance that Nintendo should have made before burying the handheld that was home to a trove of Metroidvanias, 2D side scrollers such as Sonic Advance 2 & 3, and legendary RPGs like Pokémon Emerald and the Golden Sun series. The Game Boy Advance’s games still hold up incredibly well today and playing them on a larger screen with better sound and the original horizontal layout are all great reasons to build a Game Boy Macro.
These days, though, it seems everyone is collecting Game Boy Advance games. It’s wild how Game Boy Advance game prices have skyrocketed on eBay, even for mediocre titles. Good Game Boy Advance Games typically start at around $20-30, but the current market bubble has caused prices for sought-after games to jump quite a bit. For example, I purchased a loose copy of Final Fantasy VI Advance for $35 last July, but today it’d cost almost $90 according to Price Charting, a website that tracks game prices across the internet. To avoid paying ridiculous prices for GBA games, definitely shop around or wait for things to cool down.
The owner of a local retro game store here in North Texas acknowledged how tough it’s become for Game Boy Advance collectors, confessing to recently paying $200 for a complete-in-box (CIB) copy of The Legend of Zelda: The Minish Cap. His store, where I bought many of my Game Boy Advance games, currently has nothing but garbage licensed games that sell for around $5-10.
GBA game prices have skyrocketed on eBay, even for mediocre titles.
Nintendo has so far refused to release Game Boy Advance games for the Switch, which really sucks if you never got to play old titles or want to legally replay them without using old GBA hardware. You could go the emulation route with products like the EZ-Flash Omega or the EverDrive-Game Boy Advance X5 Mini, which can be loaded with game ROMs, but they’re expensive and piracy is illegal. (Input doesn’t condone piracy so learn your local laws regarding ROMs and follow them.) I own the EZ Flash Omega and although it drains battery life, I can play Game Boy, Game Boy Color, Game Boy Advance, and NES games with save states. The best part is that it comes with a smaller cartridge so that it fits flush with the shell of the Game Boy Macro (regular Game Boy Cartridges awkwardly jut out).
With three modded Nintendo systems under my belt, the Game Boy Macro might be my favorite one. Nintendo has always operated on the design philosophy of “lateral thinking with withered technology.” This way of product design has helped the company produce many affordable, innovative products like the DS, Wii, and Switch that reinvent video games with new inputs and experiences. What would have happened if the Game Boy Advance’s life wasn’t cut short by the DS or the threat of Sony’s far more powerful PlayStation Portable? I’d like to think that Nintendo would have sold a handheld similar to the Game Boy Macro. Thanks to modding, I don’t have to imagine. Now if you’ll excuse me, I’ve gotta catch ‘em all in Pokémon Ruby.
